This post contains affiliate links. Read the full disclosure here.
Getting a towel ring for your bathroom or kitchen can be a game changer. Not only do they add a lot of functionality to the space, but they also make the entire room look tidier. Installing a towel ring is quite easy but doing it in a wrong way can end up damaging your walls permanently or make the fitting loose and unstable. Let’s take a look at how to correctly install a towel ring on any wall.

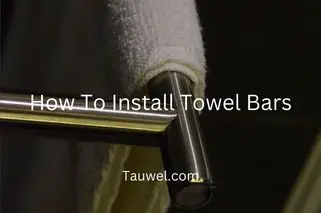
Measure and mark the area where you want to install the ring with a pencil. Drill holes into the marked area and install the drywall anchors. Hammer them in to make them flush with the wall. Install the mounting brackets and slide the towel ring in place to get the job done.
Contents
How To Install A Towel Ring?
Things you need: a drill, pencil, hammer, level, the mounting hardware and the towel ring itself.
In a Hurry? Don’t go without checking this TRENDING Topic Out - 6 Best Towels For Blackstone Griddle In 2022 out
The installation process for a towel ring is quite easy. Simply follow the steps below and it won’t take you more than 30 minutes.
Finding The Right Place
Choosing the right area to install the towel ring is probably one of the most important steps in the entire process. Usually, the best position for the ring is right next to the bathroom or kitchen sink. This is not only convenient but also reduces the mess when you are looking for a place to dry your hands.
The industry standard for the height is at least 40-45 (1,2 meters) inches off the ground or 20 inches (0,5 meters) above the vanity countertop. This is of course just a placeholder and the final height should be determined by your personal use. For example, if you have a child or a person with special needs, then the height should be lower.
What Tools Do You Need?
Even though the entire mounting process is quite simple, you will still need to have some tools handy. You will need a pencil and tape measure to correctly mark the areas. A level or even your smartphone for making sure the markings are aligned properly. A drill and other hardware like drill bits, screws, brackets, anchors, etc. Other than that, have a hammer ready along with the actual towel ring.
Measuring And Marking The Drilling Area
Using a pencil, a level, or a tape measure, mark the point at which you will need to drill the holes for attaching the towel ring. Compared to installing a towel bar, marking the point for a towel ring is easier as the drilling points are closer to each other.
Making sure the drilling points are properly aligned can be much more of a headache when dealing with towel rings.
There is usually a stencil that comes along with the towel ring to help you in this process. Simply place the stencil on the appropriate area and mark the hole positions with a pencil.
You can also use the level app on your phone to double-check whether the points are aligned or not.
Drilling And Attaching The Anchors
You will need to pre-drill the holes to attach the wall anchors. This is done so that the final screws which need to be put in place will have a better grip. Anchors ensure that the towel ring won’t fall out.
Use the appropriate-sized drill bit, which is usually provided with the product, and drill holes into the marked areas. Insert the drywall anchors and hammer them in to make them flush with the walls. Don’t hammer them heavily otherwise it might end up damaging the wall itself.
Attaching Mounting Brackets
Take the mounting brackets which came along with the towel ring and align it with the holes in the wall.
Take the screws and mount the brackets in place using the drill. Make sure the brackets have been properly attached before moving on.
Installing The Towel Ring
Latch the ring in place and again double-check if it is properly aligned or not. Centre the notches in the interior of the towel ring’s base. Tighten the screws using a small slotted screwdriver or the included allen key.
Try putting some weight on the ring to ensure that it has been properly fastened and you are good to go!
How To Install A Towel Ring On Plaster And Lathe Walls?
When installing any piece of hardware to a plaster or lathe wall, there is a high chance that it might become unstable or fall off. This is because these kinds of walls don’t offer a lot of grip for the screws and anchors to hold on to.
The solution to this problem is using a special kind of screw called a molly bolt. Their main feature is that they expand once inserted into the wall which increases the grip of the attachment.
For using molly bolts, the initial drill hole size might be slightly different. You can find this out reading from the manual included in the packaging of the bolts or from the hardware store where you bought them from.
After making the holes, insert the bolts and hammer them in to make them flush with the walls. Turn the bolt to expand it inside the wall and take out the threaded screw once you have made it tight and snug.
Insert the anchors and move on with the installation process as you would normally.
How To Install A Tower Ring Without Drilling?
If you don’t want to go over the hassle of drilling holes and the previously mentioned steps, there are some towel ring models out there which don’t require any drilling whatsoever.
While some models come with a vacuum seal adhesive at the back, others require applying some external adhesive to make them stick to the wall.
One thing to note is that while vacuum suction models might seem much easier to install, they are not very effective on all surfaces and there is a chance that the ring might fall out in the future. For example, vacuum suction is effective on tiled surfaces. On the other hand, it is not useful on uneven surfaces like wood.
The adhesive models are much better. All you need to do is apply the adhesion to the appropriate surface and push the ring against the wall for a couple of minutes, followed by letting it dry for 15-20 minutes. It is recommended to clean the wall surface before applying the glue or silicone to improve the adhesion.
What Type Of Adhesive Should You Use For Installing A Towel Ring?
Although some towel rings come with their own glues, there are some better alternatives you can go for.
For example, if you are mounting something on non-porous surfaces like tiles and aluminum, go for the Loctite Power Grab Ultimate Construction Adhesive. It also gives you 10 minutes after application to move around the bar on the wall.
If you are dealing with one porous and one non-porous surface, go for the Loctite Power Grab Express Construction Adhesive.
Conclusion
Hanging a towel ring is quite an easy task. You will need a drill, the required drill bits, a ruler, a pencil, and drywall anchors if there are no studs in the area where the ring is supposed to be installed. You can also choose to use an adhesive if you don’t want to drill holes into the wall but it may not be a permanent solution.